Project: Tsunami Simulation

Introduction
Collaborating with two other students for our undergraduate senior capstone, this project uses Unreal Engine to simulate how a tsunami would affect the city of Seaside, Oregon. The heightmap and building data were provided to us by various researchers and were imported into Unreal Engine using softwares such as ArcGIS and CityEngine, thus allowing for the simulation of a realistic tsunami over the terrain.
Latest Demo
First Demo
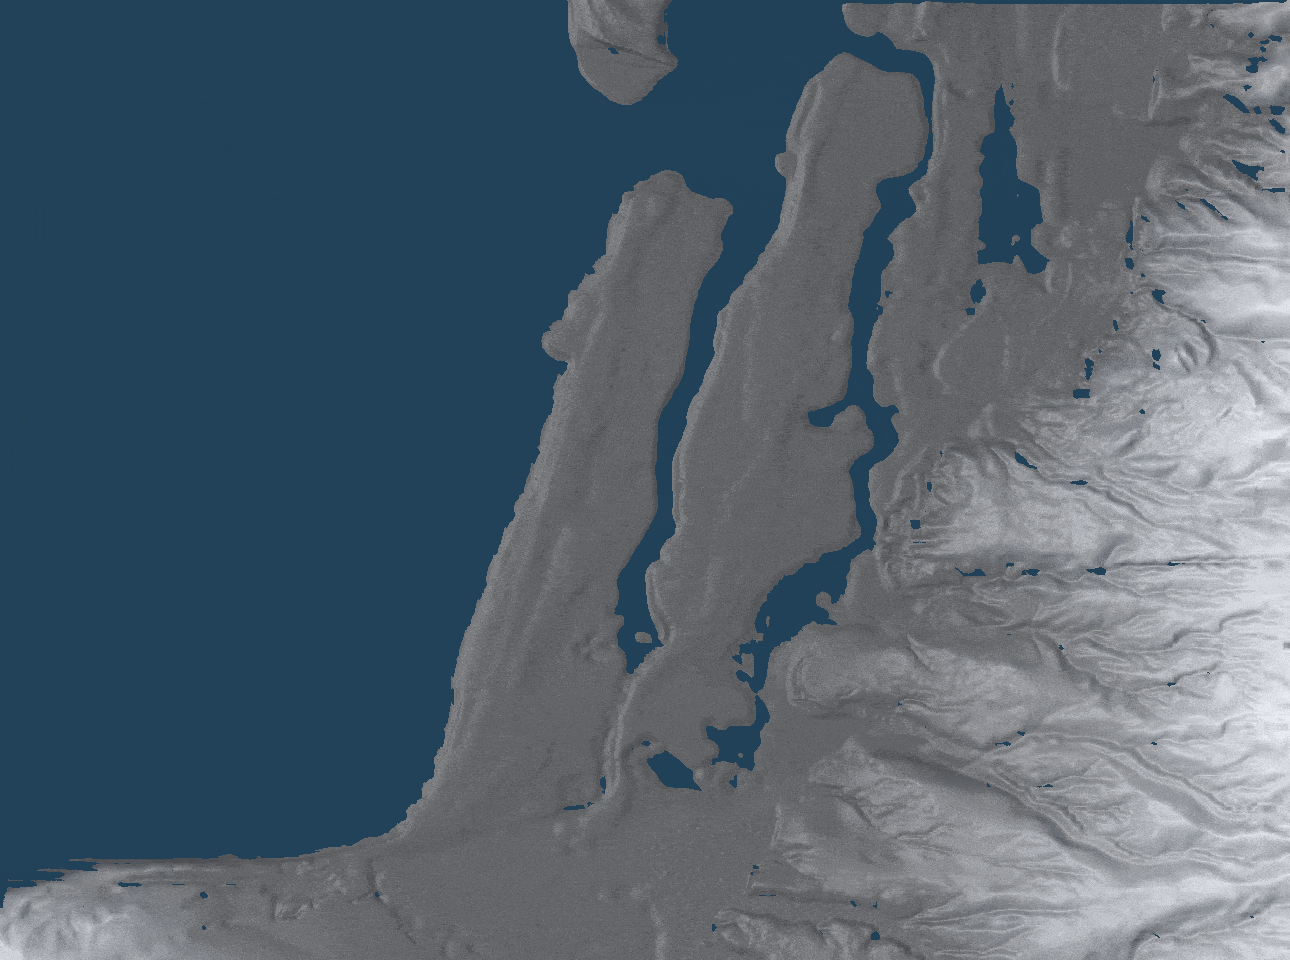
Importing the Landscape

The first step in generating accurately-located terrains in Unreal Engine (UE) is to import a DEM (Digital Elevation Model) into the software. The DEM we used was obtained by using ArcGIS to merge the topography from .img files taken from nationalmap.gov and the bathymetry taken from a DEM given to us by some researchers, which was exported as a .tif file. Then, we used a custom python script utilizing the GDAL library to convert it to a 16-bit .png, an image file type that Unreal Engine (UE) can accept. However, UE maps black pixels to -255 meters and white pixels to 255 meters, and so the imported landscape will need to be scaled to match the range of the actual terrain. This can be accomplished using a simple ratio, which is used to scale the landscape along the Z axis:
Next, the landscape will need to be repositioned on the Z-axis. Given that only the scale was changed in the previous step, UE still considers the sea level to be exactly halfway between the maximum and minimum elevations, which may not accurately reflect where the sea level is on the original DEM. As such, the following formula is used to position the landscape correctly (it moves the landscape up so that its lowest point is at sea level, then it moves it down by the original DEM’s lowest height):
Finally, the landscape will need to be appropriately scaled along the X and Y axes. This might seem like a simple task given that UE’s units are in centimeters while most DEM’s units are in meters, and so the landscape would be scaled by 10 (or 1000%) along both axes. However, this was slightly more complex in our case, as each of the DEM’s pixels actually represents 7.1854x10.2917 meters. Unfortunately, with regards to landscape importation in UE, both the X and Y scales need to be the same and so we could not scale the landscape accurately within the software. As such, we simply scaled the image prior to importing (using the cubicspline sampling method in the GDAL python library) and used the resulting image for the landscape instead. Thus, an accurate representation of the real-world terrain could be generated.

Inaccurately scaled DEM

Sea level visualization from an external software

Sea level visualization in Unreal Engine
Simulating the Tsunami
We were provided with a set of 120 .tif files that represent the height of the tsunami in 30-second intervals (covering an hour of time). Given that a requirement for our capstone is to use Unreal Engine as much as possible, we used a material to consistently interpolate between the frames, giving the illusion of an animated tsunami. However, using more than 16 textures in a material is not ideal for performance, and we have 120 frames to animate… our first implementation of this animation caused a great amount of lag. Luckily, given that each of the images are grayscale, a very convenient optimization presents itself: assigning an image to a single channel of a texture. There are 4 channels per texture (RGBA), and so this reduces our texture count from 120 to 30. While this is still using more than 16 textures, we no longer experienced any visible performance issues. To implement this solution, we used an external script to perform this compaction, as illustrated in the following example (note that the images corresponding to 4 and 8 were assigned to the alpha channel, and so it only appears to our eyes that none of the other RGB channels exist where there is gray color in those images):


Finally, after applying this technique with the tsunami data and adding some color for a basic foam effect, we were able to generate the following animation (note that all the following tsunami animations are sped up by 100 in order to see the changes more conveniently):
After confirming that the material generates the correct animation, we now worked towards setting it up so that the user can interact with it and manipulate parameters in real time. To do this, we incorporated the material within a blueprint (breaking it into individual steps, as shown in the following screenshot) and created variables for each parameter that we wish to have control over. In this way, we can now store the tsunami heights into a texture (as opposed to directly animating the plane) which can be used as an input for other features (such as simulating a crowd to run away if they see the tsunami approaching).

Importing Buildings
Our first attempt to import buildings into UE was to use CityEngine’s data, however this quickly was abandoned once we realized that many of Seaside’s buildings were not registered there. As such, we switched to the data provided to us by our researchers and used that to generate buildings in CityEngine. Then, after adding some textures to approximate realism, we used the Datasmith plugin to import the buildings into UE, with the result shown in the following images:


Creating the Simulation
To assess performance as well as the scalability of this project, we tested the tsunami simulation on a small segment of the landscape with all the previously mentioned features included. This is shown in the following animation:

After confirming that all the features ran smoothly on all our machines, we then created the final map where the full tsunami simulation would take place, which is shown in the animation below. In addition, various aesthetic features were included in this simulation, such as using a water material from UE 4.26’s Water plugin for the tsunami, randomly generating height-based foliage throughout the landscape, and the inclusion of volumetric clouds:

Concluding Discussion
Our final product successfully and accurately visualizes what a tsunami hitting Seaside, Oregon would look like and serves as a foundation for simulating natural disasters on geographic landscapes. While we succeeded in our task, there is much room for making the simulation more efficient and realistic:
Simulating destructible buildings when the tsunami hits, spawning physics-based particle debris
Adding the city’s road network
Simulating a crowd that reacts to the impending tsunami (a prototype of this feature was included in our project, as seen in the video at the top of the page)
Implementing more realistic lighting and post-processing effects
Creating a realistic underwater post-processing effect
Using region-specific foliage
Simulating the earthquake prior to the tsunami and the architectural damage it would cause
Implementing a user interface allowing real-time manipulation of parameters